Saturday, November 15, 2014

Ninja Chili


I tend to crave hot soups and chili when the temperatures get cooler.  Last week's unusually early cold snap got me in the mood to whip up a quick batch of chili.  I wanted this chili to include more vegetables than usual, but I know my son who is currently in a "I don't like peppers or zucchini phase" would not eat my chili if he could see them in there.  So I used a little trick I read years ago from a book I have called Stealth Health by Evelyn Tribole, M.S., R.D.  She has many tips to "Eat Right in Spite of Yourself."  One of these tips is to dice the veggies so small they are almost undetectable.  You must be careful to choose veggies that will blend in with what you're cooking, otherwise I would advise pureeing them.  For this chili, I added red and green peppers because they would blend in easily.
  
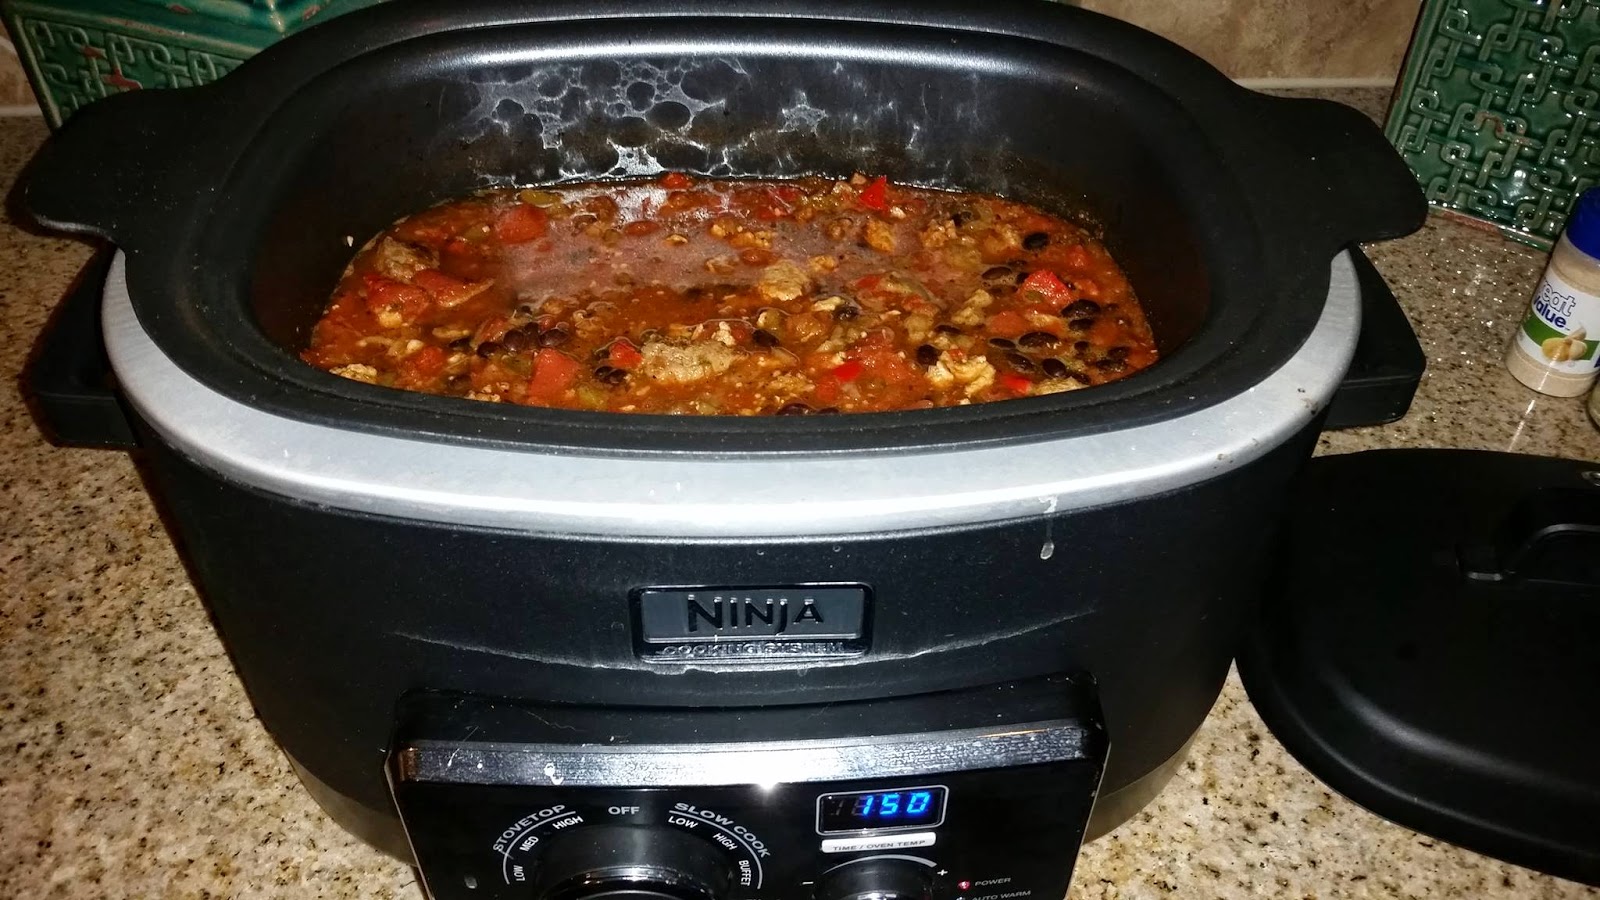
One more tip to keep this recipe cost effective and healthy is to use your own seasonings.  If you are working towards eating at home more always keep the most generally used seasonings in any recipe.  This includes oregano, thyme, basil, salt, pepper, cumin, chili powder and I'm sure a few more.  I used to always buy the Fowler's 2-Alarm Chili Kit, until I actually read all of the packets and realized I had all the ingredients anyway.  I decided I was wasting my money buying a chili kit so I stopped.  Plus, you can control exactly what goes into your chili and change things up as you get more confident in knowing what you and your family will eat.


Finally, I only call this Ninja Chili because I made it using my Ninja.  This device is a staple in helping me make quick healthy meals.  I enjoy my slow cooker and you can make this recipe using yours.  I prefer my Ninja because I can cook or sear the meat in the same pot where I'm slow cooking.  I also think the cast iron pot gives the food a different taste than the typical ceramic pot of a slow cooker.

Ingredients:
  • 2 lbs. ground meat (at least 95% lean ground beef, ground chicken, turkey or even lean pork)
  • 2 cloves garlic, chopped
  • 2 C stewed tomatoes (I ALWAYS make extra of Brooklyn Farm Girl's and freeze them - BFG Best Stewed Tomatoes)
  • 1 8-ounce can tomato sauce
  • 3 8-ounce cans of water
  • 3 tbsp chili powder
  • 1 tsp ground cumin
  • 2 tsp oregano
  • 2 tsp basil
  • 1 tsp rubbed sage
  • 1 tsp sea salt
  • 1/2 tsp cayenne pepper
  • 1 medium onion, chopped finely
  • 1 red pepper, chopped finely
  • 1 green pepper, chopped finely
  • 1 15 ounce can or 2 Cups cooked, drained and rinsed black or kidney beans (optional)

Directions:
  1. Brown the ground meat on high and break apart with a utensil that will not damage your Ninja's coated surface.  (For the recipe in the picture I used 1 pound of ground beef and 1 pound of ground chicken)
  2. Add the garlic and let cook for about 1 minute with the meat.
  3. Add the remaining ingredients, except the onions, peppers and optional beans.  Stir and switch to the slow cooker mode.  Choose your temperature based on how much time you have before serving time.  (I  put it on high since dinner needed to be in about 2 hours)
  4. Chop your onions and peppers and stir in.  
  5. Add your drained and rinsed beans.
  6. Cooks Tip: Since the chili has had a few minutes to cook, take a teaspoon of the liquid and see if it will be flavorful enough for your family.
  7. Serve hot and enjoy!

For 21 Day Fix portions - 1 1/4 C is 1 Red, 1 Green and 1/2 Yellow

Thursday, October 30, 2014

Asian-Fix - 2 Recipes portioned for 21 Day Fix

I had a taste for Asian food after completing my 2nd round of the 3 Day Refresh.  There was something about this Ginger-Carrot recipe they have in the program guide that really had me thinking about what else I could add ginger too.  I could write a whole article about the benefits of ginger for you overall health as it is believed to stimulate digestion by aiding in ridding the body of toxins built up in the liver, colon and other organs, but you probably just want to get to the recipes, right?

OK, before I do, though I have to say just two small things.  The first is that these two dishes were planned close together because I had the ingredients on hand.  It's always a goal to use up the fresh veggies buy so it doesn't go to waste.  I happened to have cabbage, carrots, cilantro and peppers.  It's helpfult to plan your meals this way so you don't waste your money letting your food spoil.  Second, both of these recipes are low-carb.  I'm not a low-carb eater per se. I exercise too intensely for that.  I do try to limit my carbs in the evening, so I try to create dishes that will fit my lifestyle.  I will also add that I do consider portions when cooking and have followed 21 Day Fix eating since March of 2014, so these are perfect for someone who does the same.


Ginger Carrot Chicken Meatballs


  • 2/3 C shredded carrots
  • 1 C chopped or shredded cabbage
  • 5 stalks of green onions chopped
  • 2 Tbsp. chopped cilantro
  • 1 Tbsp. fresh grated ginger
  • 1/2 Tbsp. chopped garlic, or 1 garlic clove pressed
  • 1 tsp. chili powder
  • 1 lb ground chicken
  • 1 egg, beaten (when I tried it out, I used 2 eggs and you can see from the pictures it might have been too much)
  • 1 Tbsp. liquid aminos (I use Braggs liquid aminos, but any soy-free seasoning will do)
  • Cooking spray

Directions:
Heat oven to 350 degrees.

Prepare baking sheet.  I like to cover with foil for easy clean up.

Combine  first 7 ingredients to a large bowl.  Add the ground chicken.  Beat egg(s) and add aminos.  Pour into mixing bowl.  Use clean hands to combine all ingredients.  Form into 12 equal sized meatballs and place on the baking sheet. (check out Hatch Green Chile Extravaganza! at Green Chile Sliders for directions on scoring meat into equal sections).

Bake for 20 minutes.  (Serve over rice or veggies)

Makes 3 servings (4 meatballs)

21 Day Fix Portions (meatballs only): 1 Red, 1 Green


Flavorful Asian Cod

  • 1 lb wild cod, cut into cubes      
  • 1 egg, beaten
  • 1 Tbsp. liquid aminos (I use Braggs liquid aminos, but any soy-free seasoning will do)
  • 1 Tbsp. Sriracha sauce
  • 1/3 C almond flour (can use almond meal)
  • 1/3 C coconut flour
  • 2 tsp. garlic powder
  • 2 tsp. onion powder
  • 1 tsp. chili powder
  • 1 tsp. ground black pepper
  • 1 Tbsp. Coconut Oil
  • 1 Tbsp. Peanut Oil
  • 2 tsp. Olive oil
  • (omit oils if pan frying, otherwise use cooking spray if broiling)

Directions:
After cutting cod into cubes, set aside.  Beat 1 egg in a dish or bowl large enough to hold the cod.  Stir in the liquid aminos and Sriracha sauce.  Add cod to the dish and ensure every piece is coated with the mixture.  Let set for about 15 minutes.

In the meantime, in a separate large flat bowl, combine flours, powders and pepper.  Mix well.  Prepare iron skillet for pan frying with oil, or turn on broiler for if not.  If using the broiler, I recommend lining a baking sheet with foil for easy cleanup and spraying with cooking spray.

Finally, toss the fish in the flour mixture.  Be sure to shake off the excess when transferring to the pan or baking sheet.  If broiling, top spray generously with cooking oil over the top of the fish as the almond flour tends to burn at high heat.

Pan fry for 3 minutes each side or broil for 8-10 minutes.

Serve over rice or your favorite veggies.  For the picture, I sauteed the remaining cabbage I had from the first recipe, onions and red, yellow and green peppers and mushrooms.

Makes 3 servings.

21 Day Fix Portions (when served over 2 C Veggies and): 1/2 Blue, 1/2 Orange, 1 Red, 2 Green, 3 teaspoons (1 teaspoon for broiled)

Friday, September 5, 2014

Hatch Green Chile Extravaganza!

One way I stick with healthy eating is to enjoy fresh seasonal foods.  Fresh New Mexico Hatch Green Chile add a flavorful twist to nearly any recipe you may normally make.

I had to read up a little so I knew when to be prepared for this season to come up every year.  I've added a link to a blog that gives a small amount of info for my readers as I create this post: http://www.hatch-green-chile.com/when-is-hatch-chile-season/.  As I write this, I know that there is a slight bit of urgency to get this out.  I mainly want to share some of the items I created or 'spruced up' with green chile.  I hope it inspires you to create some of your own or try some of mine and enjoy the deliciousness this season has to offer!

If you haven't checked out my first "Green Chile" post, check out: Hatch Chile Mini Quiches.  So after creating breakfast, I moved onto dinner.  

Green Chile Sliders:

Green Chile Sliders are a delicious twist on your traditional slider.  Some recipes I saw topped a regular slider with green chile, but I prefer the chile mixed in.

So I mixed up about 2 pounds of 96/4 ground beef with a little pink Himalayan salt, black pepper, oregano, cumin and marjoram to taste.  Just sprinkle it in!  I never truly measure my seasonings and if anything, you'll add too little over too much.  I diced 4 large roasted chile.  I definitely took a short cut on all my recipes by buying the chile already roasted.


After thoroughly mixing all ingredients, I formed on huge patty so I could divide the burgers evenly by scoring the huge patty into even sections, just like slicing a pie.  I learned that trick from an episode of Rachel Ray as a way to prevent "the runt" burger.  Another trick I learned from the same episode was to make the center of the patty thinner than the edge of the patty.  This ensures the burger is cooked evenly through and without crispy edges.

I formed all the burgers and cooked them for about 5 minutes at 400 degrees on my panini grill press.  One of the tips I learned from the "Good Stuff" cook book is that the key to a good burger is the bun.  I served these sliders on butter toasted Kings Hawaiian rolls.  The book also suggests to use a higher fat content in hamburger meat, but as you can see, I chose 96/4 so that I could toast the buns with a little bit of butter instead.  With the seasonings and the green chiles the lower fat content of the meat was just fine for this tasty treat.  1 slider with a salad was enough for me.  My football playing son, however had 3 sliders and salad.  It was absolutely delicious and I was proud of this quick and tasty meal!


Green Chile and Flank Steak Breakfast Tacos:

A couple days later, I went back to breakfast.  On a whim one morning I whipped up some Green Chile and Flank Steak Breakfast Tacos!  I'm not sure why I call them breakfast tacos.  I grew up eating breakfast burritos in Colorado.  When I moved to Texas, all I heard about were breakfast tacos.  All the same ingredients, just slightly different folding and or rolling!  So don't get upset if I'm completely wrong about this, but I believe the burrito is folded at the ends and rolled.  The taco is folded in half and then most times folded again, but since its a soft flour tortilla it really seems like a roll to me.  Either way it's YUM!!  My son ate 3!


This recipe is as simple as the burgers.  Dice up some green chiles, onions and cooked flank steak (ours was left over from dinner the night before).  Heat in a spayed skillet with 1 TBSP olive oil.  I cracked 10 brown eggs, but if I didn't have brown eggs, I would have done 10 egg whites plus 2 eggs.  Season with oregano, basil, black pepper and a pinch of sea salt.  The more seasoning the better for eggs.  I absolutely love basil and/or oregano with my eggs.  When the eggs are finished, heat the whole wheat flour tortillas and fill with your ingredients.  I added cheese for my son's tacos and salsa for both.  Since I love to have my breakfasts prepared ahead of time, breakfast tacos/burritos are great to make and reheat.  


New Mexico Hatch Green Chile Stew:

Finally, back to dinner with a New Mexico Hatch Green Chile Stew.  I can't take credit for the recipe, though.  I found it at: http://mjskitchen.com/2013/01/new-mexico-green-chile-stew/.  I froze 2 containers for 2 easy and delicious dinner or lunch in the future.  This stew was a little too spicy for my son's liking, but it was delicious and super easy to make.


 Since you have the recipe at the link, I don't need to elaborate on it too much.  Except for some of the small changes I had to make.  I don't typically make changes to a recipe the first time around, but I did choose to use my own homemade stewed tomatoes because they are delicious!  I even added Hatch Green Chile to the tomatoes.  I also had to use a meat tenderizer to pound the coriander seeds as I did not have a mortar and pestle and wasn't certain I needed to buy one.  


I also used my Ninja for everything, except toasting the coriander seeds, because its so easy.  Just one pot.  I prefer the Ninja over my Crock pot simply because I can sear or brown meat in it.  I also think meat has a distinct 'Crock pot' taste that I'm not too fond of, but I do not get that taste with my Ninja.


What kind of dishes do you love to make with New Mexico Hatch Green Chile?  I'd love to find more healthy dishes to make when I get that New Mexico Hatch Green Chile craving, so share, please.  Thank you!

Sunday, August 24, 2014

Hatch Chile Mini-Quiches

I absolutely LOVE New Mexico Hatch Green Chiles!  Not sure what made them so special to my palate, but when it's there harvest time in late July/early August, I can't help but come up with new dishes or try out new recipes that include them.

Finely chopped green chiles

So, last week, one of the dishes I created was Hatch Green Chile Mini-Quiches.  Since I track my nutrition using 21 Day Fix containers these can easily be converted and they contain a lot of veggies.  I also happened to be going through my monthly clean eating challenge at that time, so I also had to ensure the ingredients followed the rules of the challenge.  If you'd like to join one of my free clean eating challenges, head on over to www.techifitness.com/nutrition and add your name to my contact form or find me on Facebook - Kara Henson or Facebook - Techifitness.

OK, we really came here for the recipe right?!  I'm so glad you did.


Hatch Green Chile Mini-Quiches 

9 Farm Fresh Eggs
3 C Spinach, chopped
1 C white or yellow onions, diced
3 TBSP chopped cilantro
2-3 roasted New Mexico Hatch Green Chiles (about 1 C), finely chopped
Himalayan Pink Sea Salt (to taste)
Ground Black Pepper (to taste)
Oregano, Marjoram, Chives (fresh or dried, to taste)
Red Chile Powder (opt.)
3 Chicken Sausage Patties (or any lean breakfast sausage), crumbled


Directions
  1. Heat oven to 350 degrees    
  2. Chop veggies and add to bowl
  3. Beat eggs add to bowl
  4. Add seasonings and mix well (I love eggs with tons of flavor so I use a lot!)
  5. Add in sausage crumbles
Scoop ~1/4 C into muffin tins, coated with cooking spray or lined with foil tins.  I detest cleaning muffin pans, (probably because I only have cheap pans), so I always use foil tins with the paper liner removed.


Bake at 350 degrees for ~25 minutes.


Makes 1 dozen or 6 servings.  Each serving is 1 Red, and 1 Green.

More green chile recipes coming soon!  I'd love to hear what you make with your green chiles.  Share a link to the recipe or share your pictures here or on Facebook!  Show me some green chile love!


Wednesday, June 18, 2014

Plan for Success

By far, the way you eat determines your success in any weight loss regimen.  Even if you're goal is not weight loss, who isn't looking for improved health?  Isn't that the goal anyway?  Improved health means improving the way you feel and the way you look.  That's a complete WIN!

I used to be a person who would workout hard so I could eat anything I wanted.  During my initial weight loss journey, this was fine.  I knew eventually I'd have to start focusing on my eating.  At the time, I didn't understand that focusing on my eating did not mean a diet.  I go into my former struggles in "Getting Fixed", so I won't go into it all again.  Bottom line - you can't out exercise a bad diet.  Plus, when you set your goal for wellness, you will eat in a way that gets you to your ideal weight.

So the biggest deterrent from eating well, is time.  As a single parent to a busy athletic teen,  a full time engineer and a fitness coach, I know a little about managing a busy schedule.  It takes more time to prepare fresh foods than it does to dump something from a can or a box.  However our bodies were not designed to eat the convenient and processed foods.

I know I've done this before.  I started out with the greatest intentions by buying fresh fruits and veggies.  I get everything home and in the refrigerator.  Then, my week gets busy and the prep time scares me.  The fear of getting all that food chopped, cooked and onto the table for myself and my family would allow me to block it out.  Before I knew it, the food would go bad.  What a waist of money!  I've actually heard people say that they just eat out because they waste the food the buy for their homes.

There's no skirting around the issue, but following a nutritious eating plan will take a little bit of planning.  As I always tell the people I work with,  "No one ever plans to fall.  But you can fail to plan."  I find that when I don't plan, I don't get as many fruits and cruciferous vegetables into my meals.  These are the foods that provide you with the biggest bang for your buck in your health improvement effort.  They are packed with so many vitamins, minerals, fiber, you name it.  Plus with their generally lower calorie content, you can eat a lot more, helping to keep you satisfied throughout the day.  I will tell you what how I plan to keep my eating on track and avoiding last minute restaurant food runs.  I hope some of these tips will benefit you and give you ideas of how you can "plan for success," for you and your family.

Create a Meal Calendar

Planning your meals ahead of time can help you shop.  A smart planner will plan to use foods that are on sale and to save on prep time, use foods that can be cooked once and then combined in different recipes.  Baking or grilling chicken for one dinner can then be used in a casserole for another dinner and chicken salad for a couple lunches.  The same goes for the veggies you buy for a recipe.  I used to have a hard time using up celery.  I'd make a recipe that would use 2 stalks of celery and then may not ever get to them again.  Planning meals and snacks that help you use up all the ingredients you buy requires a little extra time, but will save you money in the long run.  


I created this meal planner from a template in Microsoft Excel.  I would get suggestions from family requests, websites or recipes I want to try.  I even add my meals where I plan to dine out with friends.  If you need some help planning your meals, TeamBeachbody has access to meal planners for $2.99/week.  You can get access to this site by going to getfit.techifitness.com, clicking 'Join' and choosing the 'Club Membership.'  There are plenty of other sites that also gives you access to meal planners, as well, but this is the only one when my coaching is included at any level of membership.

Finding ways to use up all your fresh ingredients leads me to my next tips, because they provide more options to ensure you have healthy food available when you need it.


Washing, Cutting and Packaging Fruits and Veggies is a Part of the Shopping Process


This one is a relatively new one for me, but it has proven to be help me out the most.  When you think of getting your fresh fruits and veggies ready for use, just like shopping and unloading the groceries, you are more likely to use them up and you are more likely to grab them in a crunch.  In addition, you are less likely to buy too many of them. 

Always wash any fruits and veggies that you bought before putting them in the refrigerator.  For fruits and veggies I plan to take to work with me that week or want my son to grab as a snack, I package it up in a single serving size.  This way, when I'm packing my meals for the day, I can grab and 'toss' into my lunch bag.  Also, I've noticed that my son will grab grapes quicker when they're washed and in a sandwich bag, than if they are just washed and in the original bag.


Chopped Peppers added to single serving bags

Before you start, make sure you have plenty of containers or sandwich bags (or larger) on hand to package up your fresh fruits and veggies.  If they are being used for a recipe you'll make later, go ahead and package them up right then.  It'll make your recipe prep that much faster.  You'll feel like one of those chefs that are displaying their recipes on the News & Talk Shows.


Prepare Extra and Package It Up! (Freeze if necessary)

I try to double any recipe I'm making for dinner, unless it's for the first time.  This helps me cook once and eat twice.  Plus, if there is a dish you and your family really enjoys, you know that you will not have to fuss over it the second time, which actually makes it taste even better.  Dishes that freeze well include enchiladas, soups and chili, casseroles, stewed tomatoes and so many others.  For your best results, minimize the air in the container and do not freeze longer than 3 months.


When it comes to breakfast, don't be afraid to cook a huge pot of oatmeal or other breakfast cereal and place a single serving into containers.  This really helps getting out of the house in the morning go a little smoother.  My son will grab his "oatmeal circle," as he calls it since the oatmeal is stored in a round container.  He also knows that his containers are the larger 1 C serving while mine is the smaller 1/2 C serving.  I also either boil up eggs for the week, peel them and store in a huge Ziploc bag.  These will not last longer than about 5-6 days.   To change things up, I'll make scrambled eggs (4-5 whites/1 full egg) with the veggies I prepped earlier.  I'll make more than one serving so it will last a couple days.  The same goes for bacon (any kind),  and sausage.  It is easy to pop these in the microwave to heat up a fast hot breakfast before dashing out to start the day.


Go Ahead and Roast Up Those Veggies

Just like I cook up a large quantity of oatmeal, I like to roast many of the veggies I will eat during the week.  Roasting veggies is a nice change from steamed, stove top cooked or microwaved.  You get a wonderful flavor.  It's also something you can do it bulk based on what is on sale.


Cinnamon-Coconut Roasted Sweet Potatoes
 You can roast almost anything! I've tried broccoli and cauliflower, to potatoes (both white and sweet), to peppers, onions, green beans and my latest favorite, baby Brussels sprouts.  Plus you can change up the flavors in so many different ways depending on your tastes.  In the sweet potatoes I have pictured that day I chose to rub coconut oil and them and sprinkle with cinnamon.  This was an idea I learned from a friend.  Sweet potatoes are also super tasty with olive oil, garlic and a little bit of sea salt.


Roasted Green Beans
I saw celebrity fitness trainer Chris Powell talk about roasting green beans on one of his episodes last year.  Roasting green beans turn a vegetable you might normally eat with a fork into finger food.  Here, I toss in olive oil and add marjoram, oregano and sea salt.

I started roasting baby Brussels sprouts just recently as they are more tender over the larger variety.  I love to add garlic and onion and toss in olive oil, sea salt, black pepper, oregano and marjoram.  You can really use any of your favorite seasonings with these.  Pictured are some Red Peppers I purchased that were on sale.  It is easy to add these to a breakfast taco or with eggs for breakfast.  I can also add these to any other veggie with my dinner.or on a sandwich for lunch.  Roasted red peppers add a twist to almost any dish!
Roasted Brussels Sprouts plus Red Peppers

When making a shift towards healthier eating remember to think small.  Think of making small changes over time.  Creating healthy habits help your success in the future.  The better you get at planning, the more likely you are to make it stick! 

Wednesday, May 21, 2014

Slow Cooker Chicken Fajitas - 21 Day Fix Style

One of my challengers shared this recipe with the group in our 30 Day challenge.  I changed it up a bit since I have been tracking my portions with the 21 Day Fix so I could make it easy track my containers.  This has the be the simplest recipe EVER!  When you read the instructions, you'll understand.

Ingredients:
3-4 chicken breasts (I put them in frozen)
4 cloves of pressed garlic
2 tsp of chili powder
2 tsp cumin
1 Tbsp. cilantro
4 bell peppers, any color (sliced)
1 large onion (sliced)
1 14 oz can of diced tomatoes (use a low sodium version or check out this easy recipe for stewed tomatoes - http://brooklynfarmgirl.com/2013/08/14/the-best-stewed-tomatoes-ever/)


Instructions:
Put all ingredients in the crock pot and cook on low for 8-10 hours or high for 4-6 hours.


If your time will allow it, add the bell peppers to the slow cooker in the last hour so they aren't too soggy.

When the cooking time is over, shred chicken with a fork.

To Serve:

Place 1 Red container of the chicken mixed with tomatoes and garlic onto a whole wheat flour tortilla.  Top with 1 Green container of sliced peppers and onion.
Optionally serve with 1 Tbsp. of Non-fat Greek yogurt, a blue container of shredded cheese or a blue container worth of avocado, i.e. 1/4 avocado  (or mix them).

1 fajita is 1 red, 1 Green, 1 Yellow and an optional blue.

Enjoy!

I must give a shout out to my friend who inspired this recipe.  Her family owns Center Greenhouse, Inc. in my home state of Colorado.  They have some amazing information for those of you with green thumbs and those of you who wish they had them.  Check out their blog at: Power Flowers Blog

Tuesday, April 15, 2014

21 Day Fix Recipe - Tostadas

Whenever I ask my son what he wants for dinner, his answer is always the same... tostadas!  I don't blame him.  My tostadas are "da bomb!"  I never want to avoid family favorites just because my focus is on healthy eating.  What I want is to focus my favorites in a healthy direction and still make them taste delicious.  Here's my recipe for tostadas with healthy portions.  ENJOY!!


21 Day Fix Tostadas

  • 1 lb. extra lean ground beef, I use 96/4 or 98/2
  • 1 Tbsp. chopped garlic
  • 1 1/2 C chopped green onions
  • 1 14 oz. can of low sodium diced tomotoes
  • 1 4 oz. can green chiles
  • 1/2 tsp cumin
  • 1 tsp chile powder
  • 1/2 tsp black pepper
  • 1 14 oz. low sodium fat free refried beans (or make your own by rinsing 1 can of black or pinto beans in a strainer. Spraying a skillet with a touch of oil spray and mashing beans with low sodium chicken or vegetable broth until beans have the consistency you are looking for.)
  • 8 corn tortillas
  • 4 tsp. vegetable oil
  • mixed green lettuce
  • salsa
  • cheese (optional)


Heat oven to 400 degrees.  Cover a baking sheet with foil.

Brown ground beef.  Add garlic and chopped green onions when ground beef is nearly cooked.

Add in diced tomatoes and green chiles.  Mix in seasonings well.

Stir in 'refried' beans.

Brush each side of corn tortilla with ~1/4 tsp of oil and place on baking sheet.  Place in oven allowing to bake ~3-5 minutes each side.  Watch as these burn easily!


Serve each tostada with 1 crispy baked tortilla, 1/2 C of beef and bean mixture, ~1/4 C torn mixed green lettuce and 1-2 Tbsp of salsa.  If using cheese use 1/2 blue container of cheese per tostada.

1 serving is 2 tostadas.  21 Day Fix portions = 2 Green containers, 2 Yellow containers and 1 Red container (optional 1 blue container).

Simple. Easy and Delicious!  My son had 2 servings so I would say they were a hit!!

Note: Add more seasonings if you like.  I usually don't measure my seasonings, when I'm cooking, unless I'm following a specific recipe for the first time, so what I have listed here is a guesstimate.


Thursday, April 10, 2014

Raising a Health Nut

Spontaneity brings excitement! Right?!  Well, this past weekend I spontaneously reorganized my pantry.  Yeah, not so exiting, but it did get me thinking.  One thing about clearing out clutter is it helps you to reflect on where you've been. The reason it becomes clutter is that it is no longer really important in your life.  You never think of things that are important to you as clutter, although someone else might.  Your treasures are clearly not important to them.


I cleared out the packaged food that clearly no one in the house was going to eat. I remembered the days when my family - which consists of me and my son who is now a young teen - would eat some of those trinkets up like it was going out of style.  Eating those healthily unhealthy delicacies.  How many times have you reasoned with yourself that the tasty little treats you might have been allowed to have once a week growing up, was OK as a daily staple because kids will burn it off fast? The truth is that children typically do have high metabolisms.  Our feelings aren't completely invalid.  However, it's a fact that childhood obesity has tripled in the past two decades and something must be done to teach our kids how to eat nutritiously and enjoy it.  I believe wholeheartedly in my responsibility as a parent to, as stated in Proverbs 22:6, "Train up a child in the way that he should go..."


What is so interesting is that during the time I was convincing myself that those little things didn't really matter, as a family, we weren't quite where I wanted to be.  Somehow I was hoping and wishing my son would magically see the light when it came to his nutrition and the the effect it had on him reaching his dreams.

I have always been one to struggle with my weight.  When I became a mother, I vowed to learn how to treat my body right and ensure my kids knew how to treat their bodies right. I definitely didn't want my children to have the same struggles I had with my weight due to lack of understanding about proper nutrition, which ultimately led to my low self-esteem

I know there are many who grew up with horrible eating habits, but who's athleticism kept them lean.  I personally know plenty of individuals who have been able to sustain their so-so eating habits into their adult lives and appear healthy.

Regardless, my reality is that my family doesn't have those genes.  We have a high rate of high blood pressure, high cholesterol, and diabetes; all related to weight.  Even at the age of 11, my son was at risk for developing diabetes.  He wasn't obese.  He was hardly overweight.  But he weighed more than the BMI chart recommendations and the doctors were concerned.  Of course I was concerned.  When I looked back at our daily habits, week after week, I began to feel like I wasn't doing my job as a parent.

So what changed?  How was I able to convince my son to improve his eating?  How did I get my kid hooked on healthy?  What I have is not a formula, but what worked for us; for him and for me, based on our situation and personalities.  As unique as we are, I know there is someone who can identify with some of the items I have listed below.

1. Teach your child why it is important to eat healthy.
My parenting style, as I would define it is a 'no nonsense' type of mother.  It is partially a result of the fact that I am a single mother and have raised my child on my own since he was 1 year old.  He has grown up around a lot of adults and like me, he is very intelligent and he thinks analytically.  He has not been raised the way I was raised, but I was also raised in a two parent home, so I prefer not to make comparisons.  My end goal is for him to be able to reason for himself.  For someone like him, giving him the logic behind the choices makes them stick.

The bottom line is, people that are in good health have a better quality of life; thus they are happier people.  You ever been around a bunch of fitness instructors?  They are chipper like cheerleaders at 5 AM!  Its not by chance and faking anything at 5 AM is impossible. There is something about eating good food and releasing endorphins through daily exercise that keep your energy and your moods up.  Even though I would occasionally use physical activity for my son as a 'punishment' for bad behavior, the truth of the matter is, he loved it, so the jury is still out on if it accomplished the intended goal.. 

2. Be honest with your child about the dangers of unhealthy eating.
When my son was 11, the doctors were concerned about his kidney function.  I took him for a physical just before preparing to spend the summer with his father. His father lives 1000 miles away from me.  Much too far for my own comfort; especially when it came to making healthy decisions as it had been proven in past summers.

Just 2 short summers before that one, I recall my son telling me how him and his cousin would walk to the store every day to get 99 cent fountain sodas.  That corner store was just outside the complex!  I made it vividly clear what he would be facing if he chose to repeat that summer.  He was full aware that he could very well be facing a life of sticking himself with a needle before he ate, after he ate, before he played sports, when he woke up, before he went to bed just to be sure his blood sugar was stable so he could eat and play sports IF he was allowed and if they hadn't needed to cut his feet off yet.  Would that scare a kid?  Maybe.  Is it a reality to some?  Absolutely!

3. Allow your child to make choices about the foods they eat.
I gave my child tons of knowledge about making food choices; how it was OK to have something your body couldn't use, just not every day.  He was also given plenty of opportunities to make choices.  I learned this technique from a class I took and book I read called "Parenting with Love & Logic" (http://www.loveandlogic.com/).  I still recommend this course to all parents today.  The whole premise is to allow your children to make mistakes through their decision making process while the consequences are small and they will be able to make wiser choices when it really counts.

Giving children this type of freedom can definitely lead to some funny moments.  I still remember leaving soccer practice one Monday evening when my son was about 8 and he really wanted some ice cream.  He proclaimed that he had earned it because he worked so hard during practice.  Of course, I told him "No."  And of course I followed it with a "because we had sweets while we were out of town this weekend."  Case closed!  Right?!  Not for this kid.  His response, "I wish you didn't LOVE me so much!"  He knew he couldn't argue the point that he didn't have sweets during the weekend.  His only resort was to the fact that I cared about him too much to allow him make a bad choice for his body.

4. Get your child involved in activity.
For my son, it happened to be sports.  He loved soccer, basketball and of course, football.  We live in Texas.  However, there are plenty of activities even outside of sports where its participants are encouraged to be healthy.  Heck, in life you are encouraged to be healthy.  It may be just coincidence, but when my son came back to me after spending that summer with his father when he was 11, he was a little leaner and definitely quicker.  Instead of spending the summer with video games and corner store sodas, he played soccer with some of the neighborhood kids.  I didn't have to make the choice.  He did!  As time went on and his athletic desires increased, he began to get a glimpse of what it would take not only physically, but nutritionally to achieve his goals.

5. Practice what you preach.
Even with all the knowledge, education, warnings, seeing other family members deal with the negative effects of high blood pressure and diabetes, and with all the choices he had a chance to make, nothing made a bigger impact on his ability to get focused nutritionally than when I became focused on my nutrition.  It has been 18 months since I said enough is enough and I got back on board with my health and fitness.  Not only have I gotten leaner and healthier, but my son has too.  Since he is still growing, his 11 pound loss is astounding.  He looks like a completely different person.  Not only is he focused on putting in the work, but he is focused on what he is putting in his body.  This is not to say that we don't ever have food that is great for the taste buds, but completely void of nutrition.  We just do it purposefully.  Those prepackaged trinkets manufactured for a long shelf life can stay on the shelf  -- just not in our home.