Showing posts with label 21 Day Fix Recipe. Show all posts

Tuesday, October 6, 2015

EX FIX Chicken - Sweet Potato - Kale Soup


Cold weather causes me to crave soup.  Now that Fall is is full effect and the weather is starting to get a little cooler I want to perfect a few soup recipes to ensure I stay on track when I'm hiding under a few layers..

Right now in Texas, where I live, the cooler temps just means the outdoors are starting to become enjoyable again.  I won't need to start bundling up for at least another month.  But for my mom, who lives is in Colorado where I grew up, the outdoor temperatures are beginning to get down right chilly.  Especially in the morning and evening. People start pulling out their layers to deal with the wide range of temperatures throughout the day.

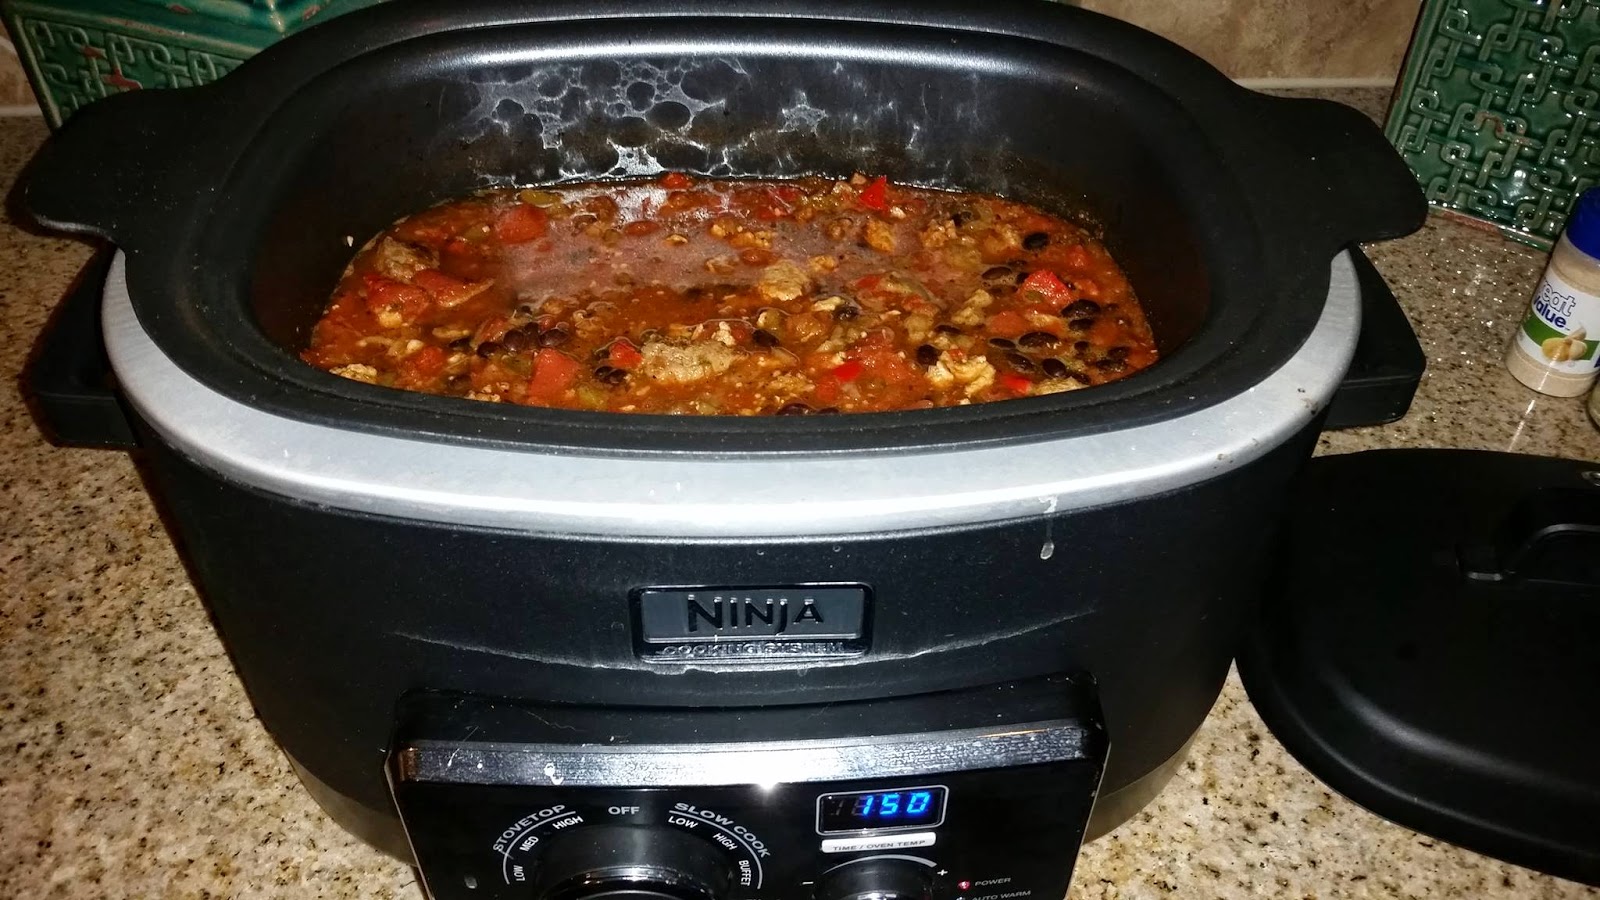
Regardless of where you live, as temperatures start to drop, nothing warms you better than a delicious bowl of soup!  Sure, nothing warms you like a tasty mug of hot cocoa, but hot cocoa is simply a treat, not a meal.  This tasty nutrient rich soup will warm your soul and keep you on track during the fall and winter months.


EZ FIX Chicken - Sweet Potato - Kale Soup

Ingredients:
  • 2 Tbsp. Olive Oil
  • 1 medium onion, diced
  • 3 C Cubed Cooked Chicken breast (I doubled my Green Chile chicken and added the 2nd batch to the soup)
  • 1 Large sweet potato, cubed
  • 3 C Kale chopped
  • 4 C Chicken Broth
  • 4 C Water
  • 1 tsp. Freshly Ground Black Pepper
  • 2 tsp. Cumin
  • 1 tsp. Basil
  • 1 tsp. Oregano
  • 1 tsp. Marjoram
  • 2 tsp. Thyme
  • ½ tsp. Pink Himalayan Sea Salt


    Directions:

    1. Cook onions in olive oil in a large stock pot.. ( I used a crock pot on low overnight for this batch)
    2. Add remaining ingredients
    3. Bring to a boil.
    4. Reduce heat and Cook until potatoes are tender.

    To serve: 


    Pour 2 Cups in your favorite soup bowl or mug and ENJOY!


    FIX proportions: 2 Cups = 1 Red, 2 Green, ½ Yellow, 1 ½ teaspoons

    Tuesday, September 29, 2015

    FIX n' Shred Hatch Green Chile Chicken

    Green Chile Pork Taco w/ Coleslaw
    Here's Round 2 of my Hatch Chile love!  I don't know what it is I love about 'em.  Maybe it's because they're only around once a year that makes them special, but I find all kinds of tasty dishes to make with them.  This one is no different, except it is so easy to make, and so versatile, I anticipate this becoming a staple in your weekly meal prep.
    Pork for team dinner

    I first started out making a couple batches of Hatch Chile Pulled Pork in the Ninja.  The first batch was for my son's high school football team dinner.  It was so tasty and involved nearly zero prep, but I was a little sad that all of it was left with the team.  I really didn't expect the 9 pound pork shoulder to make it back home but I hoped it would.

    Roasting chiles (plus red peppers)
    Truly, it was only 1/8 of the what was necessary to feed the team, so I simply had to make another batch two days later for another football gathering in my home.  It was a hit!  After two rounds of pork, I figured the recipe should work with chicken too.  I bet it will work with a beef shoulder as well, but I have yet to try.  If you try it out, let me know how it turns out, please.  

    As I share this delicious simple recipe with you, heed my warning.  Commit the seasonings to memory as this will become a weekly or bi-weekly staple in your house.  It is that SIMPLE and SO TASTY!

    If you don't have hatch chiles available or want to save more time, grab 2 7 oz. cans of diced green chiles.  Total prep time with already roasted and peeled chiles is less than 10 minutes.


    FIX n' Shred Hatch Green Chile Chicken

    Ingredients:
    • 1 Ninja (recommended) or crock pot
    • 3 pounds Chicken breast (can put in frozen)
    • 1 Onion, sliced thin
    • 3/4 C Pureed Roasted Hatch Green Chiles, peeled and seeded. (~8-9 fresh chiles)
    • 1 tsp. Pink Himalayan Sea Salt
    • 1 tsp. Dried Oregano
    • 1/2 tsp. Freshly Ground Black Pepper
    • 1/2 Cumin
    • 1/2 Cayenne Pepper
    • 1/2 Dried Sage
    • 1 Hand Mixer

    Directions:
    1. Place the onions in the pot
    2. Top with chicken
    3. Top the chicken with green chiles and spices
    4. Cook on low for 8-10 hours
    5. Shred with hand mixer on low setting.

    To serve: 


    Night 1 Dinner

    Add to corn tortillas with coleslaw for tacos, mix in soup, serve on top of salad or with veggies.  The first night I enjoyed with faux garlic mashed potatoes and green beans for a super delicious dinner.


    FIX proportions:Red.
    Enjoy!

    Tuesday, June 16, 2015

    Quick FIX Frittata

    This veggie frittata is a delicious and super easy anytime meal portion for the Quick 21 Day Fix.

    Quick FIX Frittata

    Ingredients:
    • 4 teaspoons of olive or avocado oil
    • 8 eggs
    • 8 Cups veggies (5 C chopped spinach, 1 C green onions, 1 C mushroom, 1 Red Bell pepper)
    • 2 Blue containers (1/2 C) grated Parmesan and/or Mozzarella cheese (opt.)
    • Pink Himalayan sea salt, black pepper & oregano to taste.

    Directions:
    1. Preheat oven to 450 degrees.
    2. Saute veggies in hot oil until spinach is wilted. (About 4 minutes)
    3. Beat 8 eggs.
    4. Add seasonings and cheese.
    5. Pour into pan with veggies. Stir slowly so it's well mixed, leaving the heat on.
    6. Transfer pan to oven and bake 15 minutes.
    Let  set for 5 minutes outside the oven before dividing into 4 equal pieces. 1 serving is 1/4 of the frittata.
    FIX proportions: 1 Red, 2 Green, 1/2 Blue, 1 teaspoon.
    Enjoy!

    Friday, March 6, 2015

    Take Me Back to Jamaica - Jerk Chicken and Shrimp


    Jerk Pork Chop Dinner
    Only a few short months ago, I had the honor of watching two dear friends commit their lives to one another in the beautiful city of Negril, Jamaica.  Everything I went through to ensure I could keep my commitment and witness this once in a lifetime event was out of this world and enough for a completely different blog post that I'll have to share soon, but it made my time there even more special.  I will always remember the inviting hospitality, the welcoming atmosphere, the great company of old and new friends alike, the beautiful beaches and of course the delicious jerk seasoning they had on several of the dishes I tried.


    My crew
    When I first decided to make jerk 'something' I was in search of something I could make that would be tasty enough for me and exciting enough that my teenage son wouldn't get bored with the leftovers.  I remembered a Jerk Catfish recipe from a Cooking Light magazine I did a few years back and luckily I still had the seasoning.  Have you ever found yourself trying out new recipe that calls for a whole bunch of seasonings you don't actually carry in your kitchen?  You go out an buy it and then never really use it again!  I got so fed up with my overflowing non-existent spice cupboard that when I moved out of that house I took a spice purchasing sabbatical.  I was only allowed to buy common spices when I ran out.
    Selfie time!

    I digress, so back to my dilemma with the Jerk Catfish seasoning...When I checked the ingredients of the seasoning blend, I saw the first item listed was SUGAR!  "Nooooo!," I thought.  This would not do for my 21 Day Fix Extreme eating, so I searched online for a sugar free version.  I settled with this recipe:  http://cooking.nytimes.com/recipes/1014722-no-fuss-jerk-chicken, and it did not disappoint.  Even though I did not have all the ingredients, I had enough to make it work.  I actually doubled the recipe so I could use it with the shrimp and chicken I had.  I will list a single batch recipe as I made it, but check out the link for the true recipe as I'm sure I will go through the effort to get some of the real stuff next time, if they make sense.


    Jerk Chicken (or Shrimp, or whatever you choose!)


    Ingredients:
    • 1 1/2 Tablespoons ground Allspice
    • 1 Tablespoon dried Thyme
      Mixed seasonings
    • 4 cloves garlic
    • 2 Tablespoons Dried Jalapenos (the spice factor for jalapenos is very low compared to the habanero chiles.  I wanted to be sure my son would eat this first time around)
    • 6 scallions, roughly chopped
    • 1 Tablespoon fresh ground black pepper
    • 1/2 teaspoon pink Himalayan sea salt
    • 1/2 teaspoon ground nutmeg
    • 1/2 teaspoon ground cinnamon
    • 1 2-inch piece of fresh ginger thickly sliced
    • 2 tsp coconut oil
    • Juice of 2 large limes
    • 1 1/2 pounds of boneless chicken tenders, shrimp or whatever you choose
    Marinating...
    Directions:
    Broiled Jerk Shrimp
    1. Combine allspice, thyme, garlic, jalapenos (or chiles), scallions, peppercorns, salt, nutmeg, cinnamon, ginger and lime juice in a blender or food processor and grind to a rough paste.
    2. Put meat in a baking dish or plastic Ziploc bag.  Add seasoning paste and coat well.
    3. Cover dish or seal bag tightly and marinate, refrigerated, for at least 6 hours, but preferably overnight.
    4. Heat oven to 350 degrees for chicken or turn on broiler for shrimp.
    5. Bring meat to room temperature.
    6. Bake/Broil uncovered until well browned and juices run clear when probed with a paring knife - about 20-25 minutes for chicken tenders and 10 minutes for shrimp, turning halfway.

    Meal packaged for RJ
    Servings: Use your red container to measure your protein, but I found that 1 Red container = 1 1/2 - 2 tenders or 10 shrimp.  This was easy to add with the veggies I roasted during the week or I added them to a spinach salad and sometimes paired with a sweet potato.


    Enjoy Mon!


    Thursday, March 5, 2015

    Fish n' Fries

    Who eats fish and fries a.k.a fish n' chips while they're watching what they eat?

    Me! Me! Me!  Especially if the fish is broiled and the fries are made from carrots.  Not only is this meal much healthier than the fried version, it is also much quicker to prepare and much quicker to clean up.

    So tell me... are you a "Fish n' Fry" person or a "Fish n' Chip" person?  If you're a 'fish n' chipper', you can easily switch out the carrot sticks for carrot coins.

    I hope this recipe saves your dinner by letting it be known that you can have fish n' fries (or fish n' chips) when eating healthy, regardless of what you like to call them.


    Fish n' Fries

    Ingredients:

    • 2 baking sheets lined with foil
    • 1 1/2 pounds catfish nuggets
    • 1 pound carrot sticks (~3 C)
    • 1 teaspoon olive oil
    • 1 Tablespoon chili powder
    • 1 Tablespoon garlic powder
    • 1 Tablespoon cumin
    • 1/2 teaspoon pink Himalayan sea salt


    Directions:

    1. Preheat oven to 425 degrees
    2. Combine chili powder, garlic powder, cumin and salt in a small bowl
    3. Place carrot stick in a bowl and toss with the olive oil and 1/3 (~1 Tablespoon) of the seasoning mix.
    4. Place carrot mixture on 1st baking sheet
    5. Bake at 425 degrees for 15-20 minutes, or until carrot stick are tender and start to crisp
    6. While the carrot sticks are baking, toss the catfish nuggets with the remaining seasoning.  Mix well.
    7. Add fish mixture to the 2nd baking sheet.
    8. When carrot sticks are finished, turn on the oven broiler.
    9. Place fish in broiler for 10 minutes, turning at minute 6.


    Servings: 4 - 1 Red & 1 Green  

    Wednesday, March 4, 2015

    Perfectly Tempting Pork Tenderloin

    I just have to say before I share this recipe, that if you love food (OK, who doesn't?), but don't enjoy cooking or cleaning up, you MUST get a Ninja!  Not only can slow cook, bake, roast and more with it.  But it comes with an awesome recipe booklet which was the start of this recipe.  OK, now that I've given the appropriate shout out to my favorite kitchen tool,  I will share my recipe based off their "Herb-Roasted Pork Tenderloins & Potatoes" recipe.

    Perfectly Tempting Pork Tenderloin


    Prep: 10 minutes
    Cook: 45 minutes

    Ingredients:
    • 1 1/2 pounds red potatoes, cut in quarters (or eighths)
    • 1 large onion, cut into wedges
    • 1 1/2 - 2 pounds baby carrots
    • 2 Tablespoons olive oil
    • 2 teaspoons smoked chili powder
    • 2 teaspoons cumin
    • 2 teaspoons garlic powder
    • 1/4 - 1/2 teaspoons Himalayan sea salt
    • 1 large pork tenderloin (about 3 pounds)
    • 1 1/2 C chicken broth

    Directions:
    1. Combine chili and garlic powders, cumin and salt.
    2. Cut potatoes, onion and carrots and combine in a large bowl.  Add 1 tablespoon of olive oil and 1 tablespoon of seasoning mixture.  Toss to coat.  (If you are not using a Ninja, go ahead and toss in a roasting pan.)
    3. Rub the pork with the remaining Tablespoon of olive oil and the remaining seasoning.
    4. Place the tenderloin in your Ninja pot and cook for about 10 minutes on the STOVETOP setting.  (If you do not a Ninja, you can do this in a skillet.)  Cook until it's browned on all sides, then remove from the pot.
    5. Pour the chicken broth into the pot.  Add in the potatoes, carrots and onion mix.
    6. Set the roasting rack on top and add the browned tenderloin onto the rack.
    7. Cover and cook at 375, checking after the first 20 minutes or so.
    8. Make sure pork is cooked through.

    Final Meals Prepped for the week!
    Servings: Depending on the time of day, grab 1 Yellow of potatoes with 1 Green of carrots (about 8-10 depending on the size) and 1 Red of tenderloin (about 2 slices depending on the thickness).  I had about 8 servings if eating this way, but I like to use the tenderloin for sandwiches and wraps too!


    Alternatives: Use any of the 21 Day Fix Seasonings to season this recipe.

    Tuesday, March 3, 2015

    Ninja-Slow Cooker Pumpkin Coconut Chicken Curry - Fix Approved

    It's funny sometimes how I come up with recipe ideas.  This one was actually quite simple.  I had some canned coconut milk from another recipe that I wanted to use up.  I also had some canned pumpkin from a completely separate recipe that I wanted to use up. I figured coconut and pumpkin would go well together and BAM!  I searched online, found a recipe and made it work for the 21 Day Fix.

    The base for this recipe came from: http://www.tablefortwoblog.com/slow-cooker-pumpkin-coconut-curry/.  I used my Ninja, so I could only clean one dish because I do not enjoy dishes one bit!  Plus, for some reason, I do not prefer meat cooked in a slow cooker.  It must be cooked ahead of time and added to it.  Don't ask how I can tell, but I guess my taste buds are pretty picky.

    This recipe was actually quite easy, but finding some of the spices were a bit tricky.  I ended up finding everything at Sprouts Farmer's Market.  I'm sure Whole Foods will carry them too, especially if there is not an Indian grocery in your area. 


    Fix Approved Ninja-Slow Cooker Pumpkin Coconut Chicken Curry


    Ingredients:

    • 2 blue containers of coconut milk (you can opt to do 4, but I never like to use up all of my blue unless I'm making pizza)
    • 1 C pumpkin puree
    • 1 1/2 C chicken stock/broth
    • 1/2 Tablespoon curry powder
    • 1/4 teaspoon tumeric powder
    • 2 teaspoons garam masala
    • 1/4 teaspoon pink himalayan sea salt
    • 1/4 teaspoon ground black pepper
    • 1/2 large onion, diced
    • 1 garlic clove, minced
    • 4 carrots, cut into 1-inch pieces
    • 1 C 1-inch cubed sweet potatoes
    • 2 chicken breasts, cut into 1-inch cubes
    • Juice of 1 lime

    Directions:

    1. Cook chicken over medium heat until lightly browned.  (Transfer to slow cooker, if not using a Ninja)  
    2. Add coconut milk, pumpkin puree, chicken stock, curry powder, tumeric powder, garam masala, salt, and pepper.  Whisk together to make sure its all combined and spices are evenly distibuted.
    3. Add the onion, garlic, carrots, sweet potatoes and lime juice to the mixture and stir.
    4. Cook on low for 6 hours.
    5. Serve over rice, quinoa (or cauliflower rice as I have shown, to add another green, over another yellow)
    Servings: About 1 1/4 C is 1 Red, 1 Yellow, 1 Green and 1/2 Blue.  When served with cauliflower rice you add 1 more Green.


    Enjoy!

    Monday, March 2, 2015

    Mustard-Glazed Cod

    Mustard Glazed Cod Dinner
    Eating healthy doesn't mean boring!  Eating is an experience to be enjoyed.  This quick and easy cod dish is a great start to experiencing a healthy dinner.

    I got this recipe from the TeamBeachbody Meal Planner that is available at the Club Membership level.  I then modified it to fit the 21 Day Fix portions.  This recipe was so easy and delicious that it will make it back in my meal prep rotation soon.


    Mustard Glazed Cod

    Prep Time: 10 minutes
    Total Time: 20 minutes
    Cook Time: 10 minutes
    Servings: 3
    Raw cod fillets

    Ingredients:
    • 1 lbs cod, raw
    • 1 tablespoon extra virgin olive oil
    • 1 tablespoon lemon juice
    • 1 tablespoon dijon mustard
    • 1 teaspoon basil, dried


    Directions:

    Glazed cod before cooking

    1. Preheat oven to 450°F.
    2. Rinse fish and pat it dry with a paper towel.
    3. Lightly coat a shallow baking pan with nonstick cooking spray.
    4. Place fish in prepared pan, tucking under any thin edges.
    5. Combine olive oil with lemon juice, mustard and basil.
    6. Pour sauce over fish, and bake for 4 to 6 minutes per 1/2 inch thickness of fish or until fish flakes easily with fork.
    7. Cooked, flaky cod
    8. When ready to serve, place fish on serving plate and spoon sauce over top.
    Servings: 1/3 fish is 1 Red and 1 teaspoon.

    I enjoyed this dish with 1 Green of sauteed asparagus and 1 Green of Zoodles (zucchinni noodles).  Total meal was 1 Red, 2 Green and 2 teaspoons.


    To get your own copy of the 21 Day Fix and join an upcoming group, go to: 21 Day FIx Deal

    Wednesday, February 18, 2015

    Mini Veggie Egg Cups


    I've been inspired by a new round of the 21 Day Fix and viewing posts and videos from the program's creator, Autumn Calabrese to create more recipes for my "Fixers."  This recipe is simple and easy and came straight from the 21 Day Fix Extreme Eating Plan booklet.  I whisked up 2 batches and put one in the freezer.


    I have included the recipe below and some pictures from when I made it.  At the very bottom I have added a link to a video Autumn created while making these egg cups.  I consider cooking an art and just like any form of art, the interpretation of the recipe is truly in the eye of the chef.  You will  see that we took slightly different paths, so do what works and is easiest for you.

    Ingredients:


    • Non-stick cooking spray
    • Reynolds Aluminum Foil Jumbo Muffin cups (optional, you don't even have to use Reynolds, but just make sure the paper liner can be removed.) 
    • 12 large eggs
    • sea salt of Himalayan salt (Mineralize) and ground black pepper to taste
    • Oregano, Basil and/or Marjoram to taste (this isn't in the recipe but I love any one or all of these spices in my eggs!)
    • 1 10-oz. bag raw baby spinach finely chopped (I made a double recipe and had a hard time utilizing 2.5 5-oz. bags, so do your best)  
    • 1 medium red bell pepper, finely chopped
    • 2 green onions finely sliced


    Directions:

    1. Heat oven to 375 degrees
    2. Lightly coat a 12 cup muffin tin with spray.  (I prefer to use the Reynolds Aluminum Foil Jumbo muffin cups with this inner paper removed because I strongly dislike washing more dishes than necessary and I really don't want to get inside 12 or 24 muffin tins to catch what got stuck.  Spray the baking cups just like you would the pan and don't forget to remove it when reheating in the microwave.)
    3. Place eggs in a bowl and whisk to blend.  Add in seasonings, if desired and stir.
    4. Chop veggies and add them to the whisked eggs.  Mix completely.
    5. Spoon egg mixture into tins evenly.
    6. Bake for 15-20 minutes or until an inserted toothpick comes out cleanly from the center.


    Servings:
    2 muffin cups is 1 GREEN and 1 RED.

    These will last ~1 week in your refrigerator.  They can also be frozen.  Check out Hatch Green Chile Extravaganza for more muffin cup ideas. 


    Check out Autumn's video too! http://www.teambeachbody.com/teambeachbodyblog/nutrition/recipes/mini-vegetable-egg-cups

    Saturday, November 15, 2014

    Ninja Chili


    I tend to crave hot soups and chili when the temperatures get cooler.  Last week's unusually early cold snap got me in the mood to whip up a quick batch of chili.  I wanted this chili to include more vegetables than usual, but I know my son who is currently in a "I don't like peppers or zucchini phase" would not eat my chili if he could see them in there.  So I used a little trick I read years ago from a book I have called Stealth Health by Evelyn Tribole, M.S., R.D.  She has many tips to "Eat Right in Spite of Yourself."  One of these tips is to dice the veggies so small they are almost undetectable.  You must be careful to choose veggies that will blend in with what you're cooking, otherwise I would advise pureeing them.  For this chili, I added red and green peppers because they would blend in easily.
      
    One more tip to keep this recipe cost effective and healthy is to use your own seasonings.  If you are working towards eating at home more always keep the most generally used seasonings in any recipe.  This includes oregano, thyme, basil, salt, pepper, cumin, chili powder and I'm sure a few more.  I used to always buy the Fowler's 2-Alarm Chili Kit, until I actually read all of the packets and realized I had all the ingredients anyway.  I decided I was wasting my money buying a chili kit so I stopped.  Plus, you can control exactly what goes into your chili and change things up as you get more confident in knowing what you and your family will eat.


    Finally, I only call this Ninja Chili because I made it using my Ninja.  This device is a staple in helping me make quick healthy meals.  I enjoy my slow cooker and you can make this recipe using yours.  I prefer my Ninja because I can cook or sear the meat in the same pot where I'm slow cooking.  I also think the cast iron pot gives the food a different taste than the typical ceramic pot of a slow cooker.

    Ingredients:
    • 2 lbs. ground meat (at least 95% lean ground beef, ground chicken, turkey or even lean pork)
    • 2 cloves garlic, chopped
    • 2 C stewed tomatoes (I ALWAYS make extra of Brooklyn Farm Girl's and freeze them - BFG Best Stewed Tomatoes)
    • 1 8-ounce can tomato sauce
    • 3 8-ounce cans of water
    • 3 tbsp chili powder
    • 1 tsp ground cumin
    • 2 tsp oregano
    • 2 tsp basil
    • 1 tsp rubbed sage
    • 1 tsp sea salt
    • 1/2 tsp cayenne pepper
    • 1 medium onion, chopped finely
    • 1 red pepper, chopped finely
    • 1 green pepper, chopped finely
    • 1 15 ounce can or 2 Cups cooked, drained and rinsed black or kidney beans (optional)

    Directions:
    1. Brown the ground meat on high and break apart with a utensil that will not damage your Ninja's coated surface.  (For the recipe in the picture I used 1 pound of ground beef and 1 pound of ground chicken)
    2. Add the garlic and let cook for about 1 minute with the meat.
    3. Add the remaining ingredients, except the onions, peppers and optional beans.  Stir and switch to the slow cooker mode.  Choose your temperature based on how much time you have before serving time.  (I  put it on high since dinner needed to be in about 2 hours)
    4. Chop your onions and peppers and stir in.  
    5. Add your drained and rinsed beans.
    6. Cooks Tip: Since the chili has had a few minutes to cook, take a teaspoon of the liquid and see if it will be flavorful enough for your family.
    7. Serve hot and enjoy!

    For 21 Day Fix portions - 1 1/4 C is 1 Red, 1 Green and 1/2 Yellow